Adding code or scripts (sometimes called snippets) to the <head> area in Shopify isn't as a scary as it seems.
You'll sometimes need to do this when adding third party scripts, like tracking or analytics scripts, or when verifying your domain for Facebook, or Google.
Step 1 - Duplicate Your Live Theme
This is optional but highly recommended.
When working on your Theme's code, it's always good practise to duplicate it so you have a back up in case anything accidentally breaks.
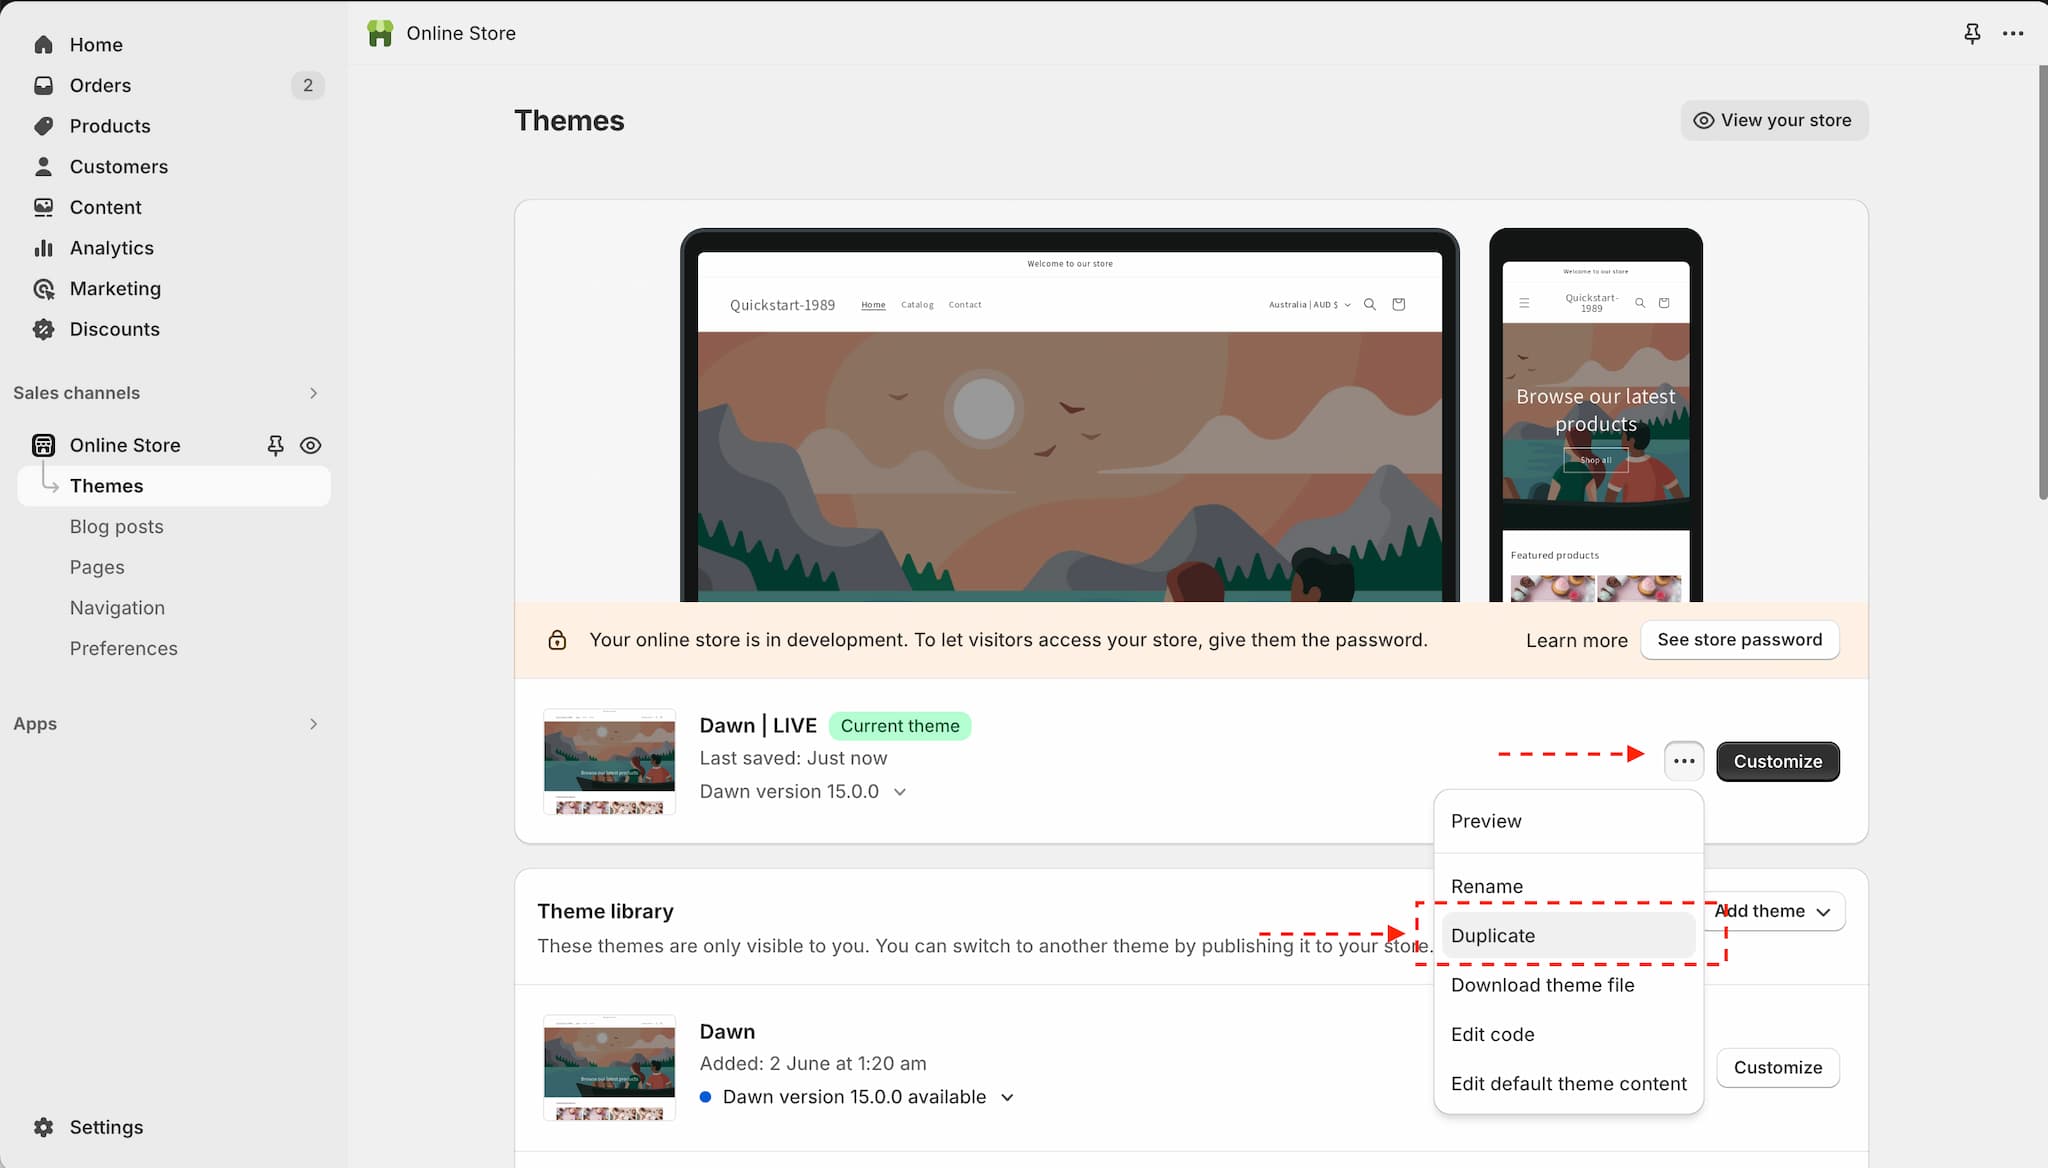
- Navigate to Online Store > Themes
- In 'Current Theme' select the Actions drop down
- Select Duplicate
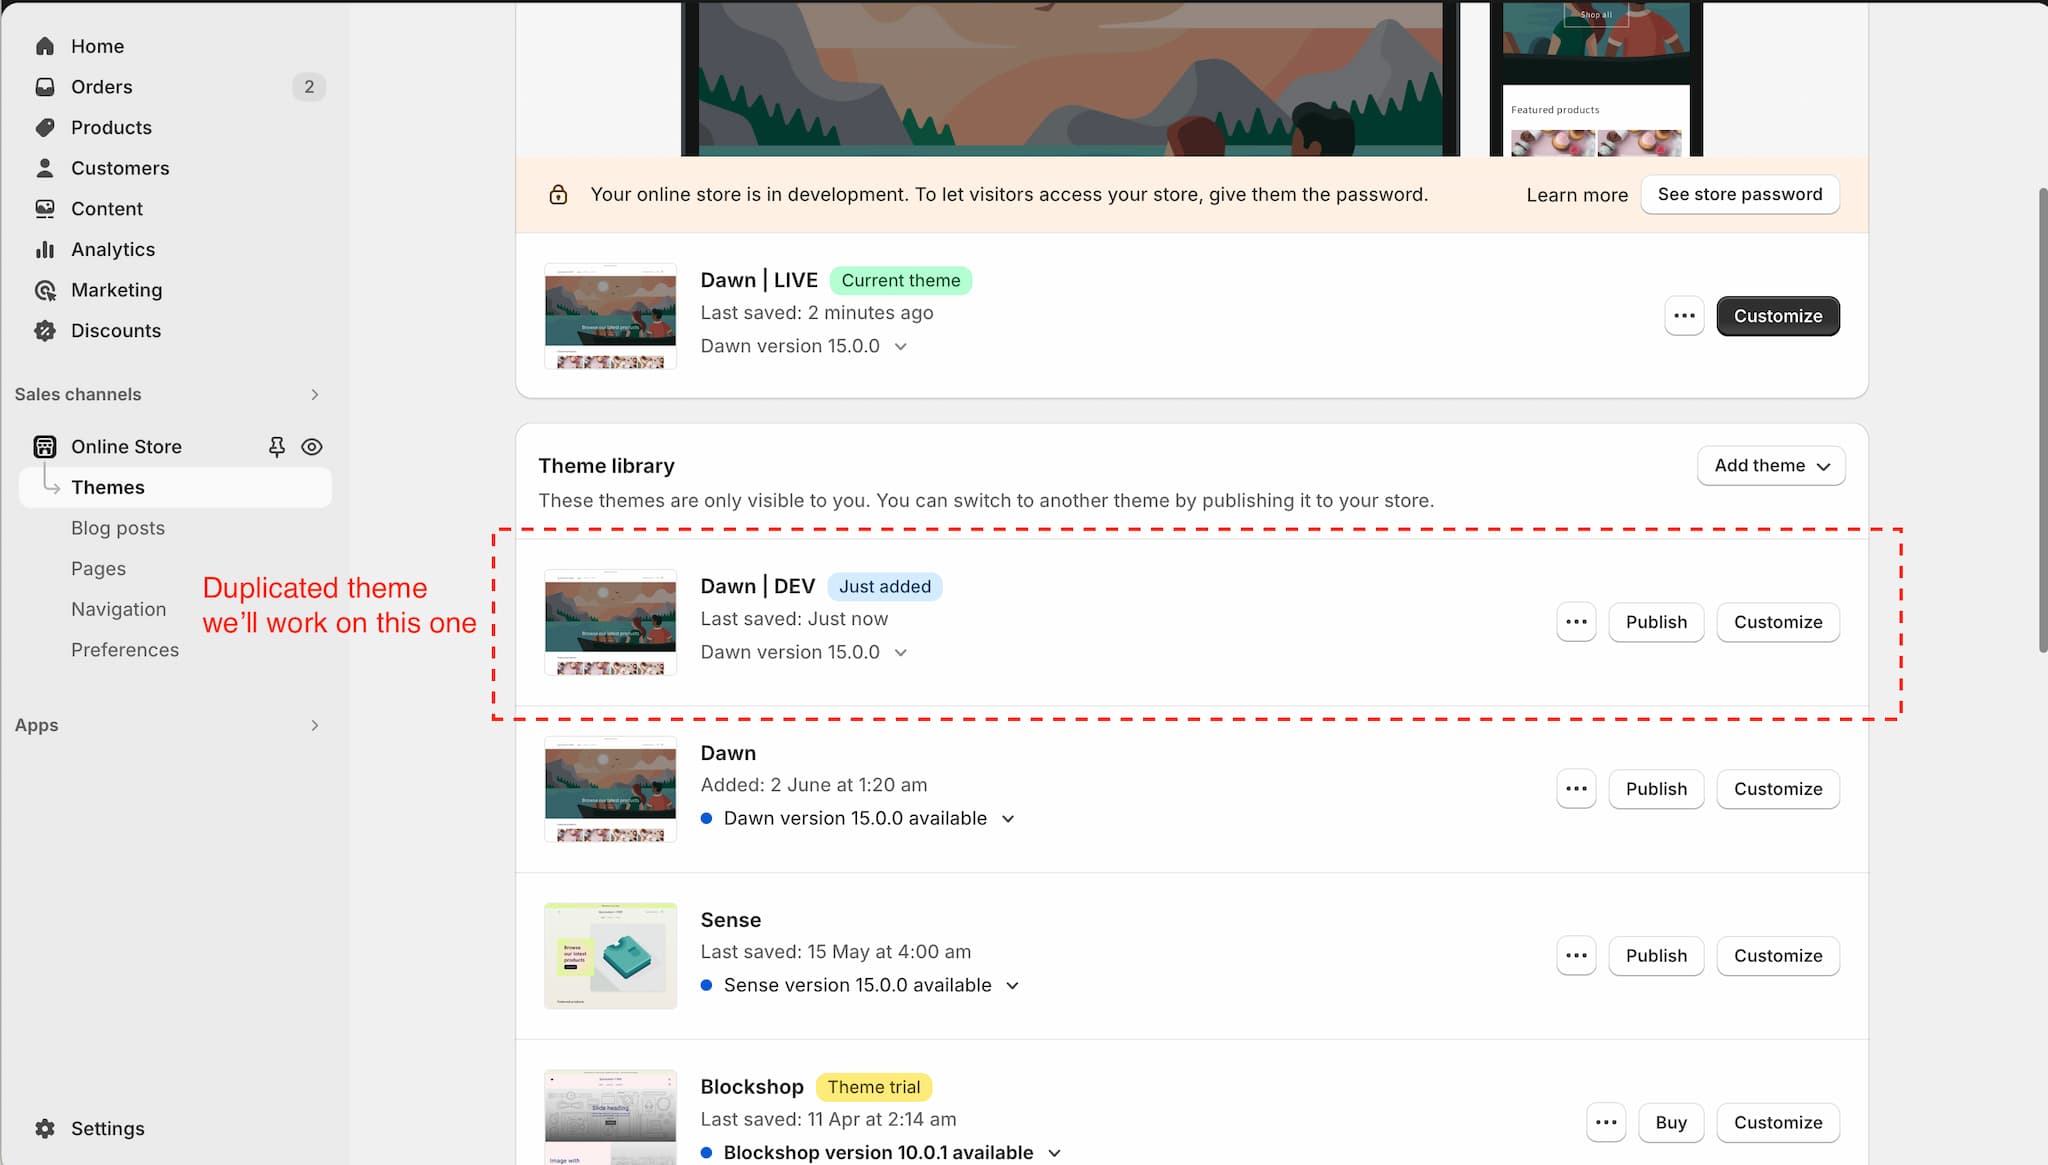
- It will take Shopify a minute or so to finish duplicated your live theme.
Click Duplicate to create a duplicate version of your live theme that we will work on safely
Side Note - Theme Naming Conventions
If you're working with a developer, they'll likely have their own naming conventions. If it's just you, I recommend using a system like the below:
--
"MyTheme - LIVE"
This is always your current live theme
--
"MyTheme- DEV"
This is a duplicate of your live theme with any extra changes you have made. ie. Your 'work in progress' theme.
--
"MyTheme - BACKUP 04-05-21"
The backup theme, which was your previously live theme.
--
After a DEV theme is published, you rename it the LIVE theme. The previous LIVE theme becomes the new BACKUP (ie. a backup of your theme before you published your changes)
- current DEV -> new LIVE
- old LIVE -> new BACKUP
- duplicate of new LIVE -> new DEV
- repeat
As you work on, and publish new changes, you rename each theme per the conventions so you always know - which theme is live, which theme you are working on, and which theme you can quickly roll back to if something breaks.
The duplicated theme we'll work on, with some naming conventions for | DEV and | LIVE
Step 2 - Edit code in the Shopify theme code editor
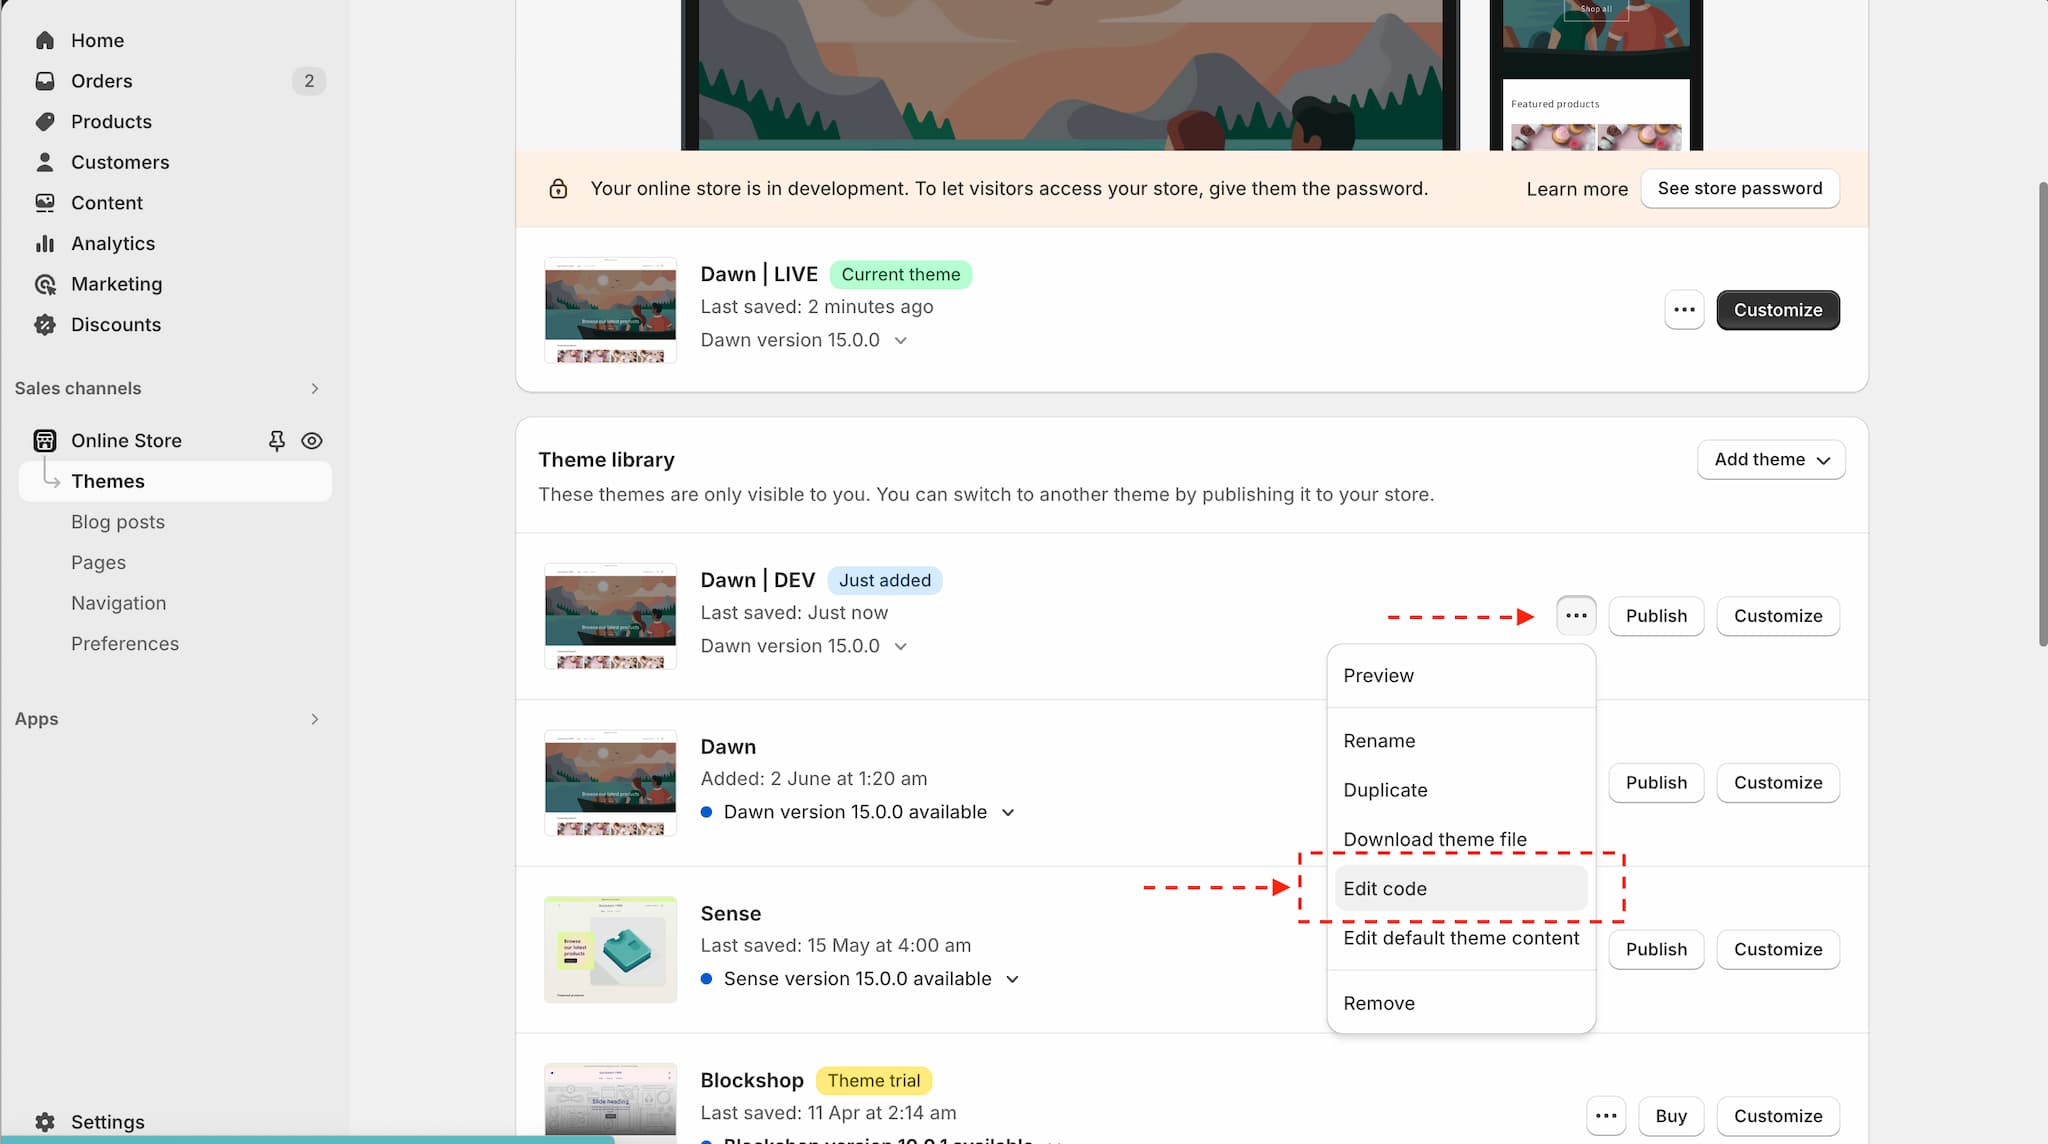
- Navigate to Online Store > Themes
- Find your newly duplicated theme, select the Actions drop down
- Select Edit Code
This will open up a new area where you can view almost all of the code files that power your store.
Click Edit code to be taken to the area where we will directly editor your code files for that version of the theme.
Step 3 - Edit the theme.liquid file and add your snippet
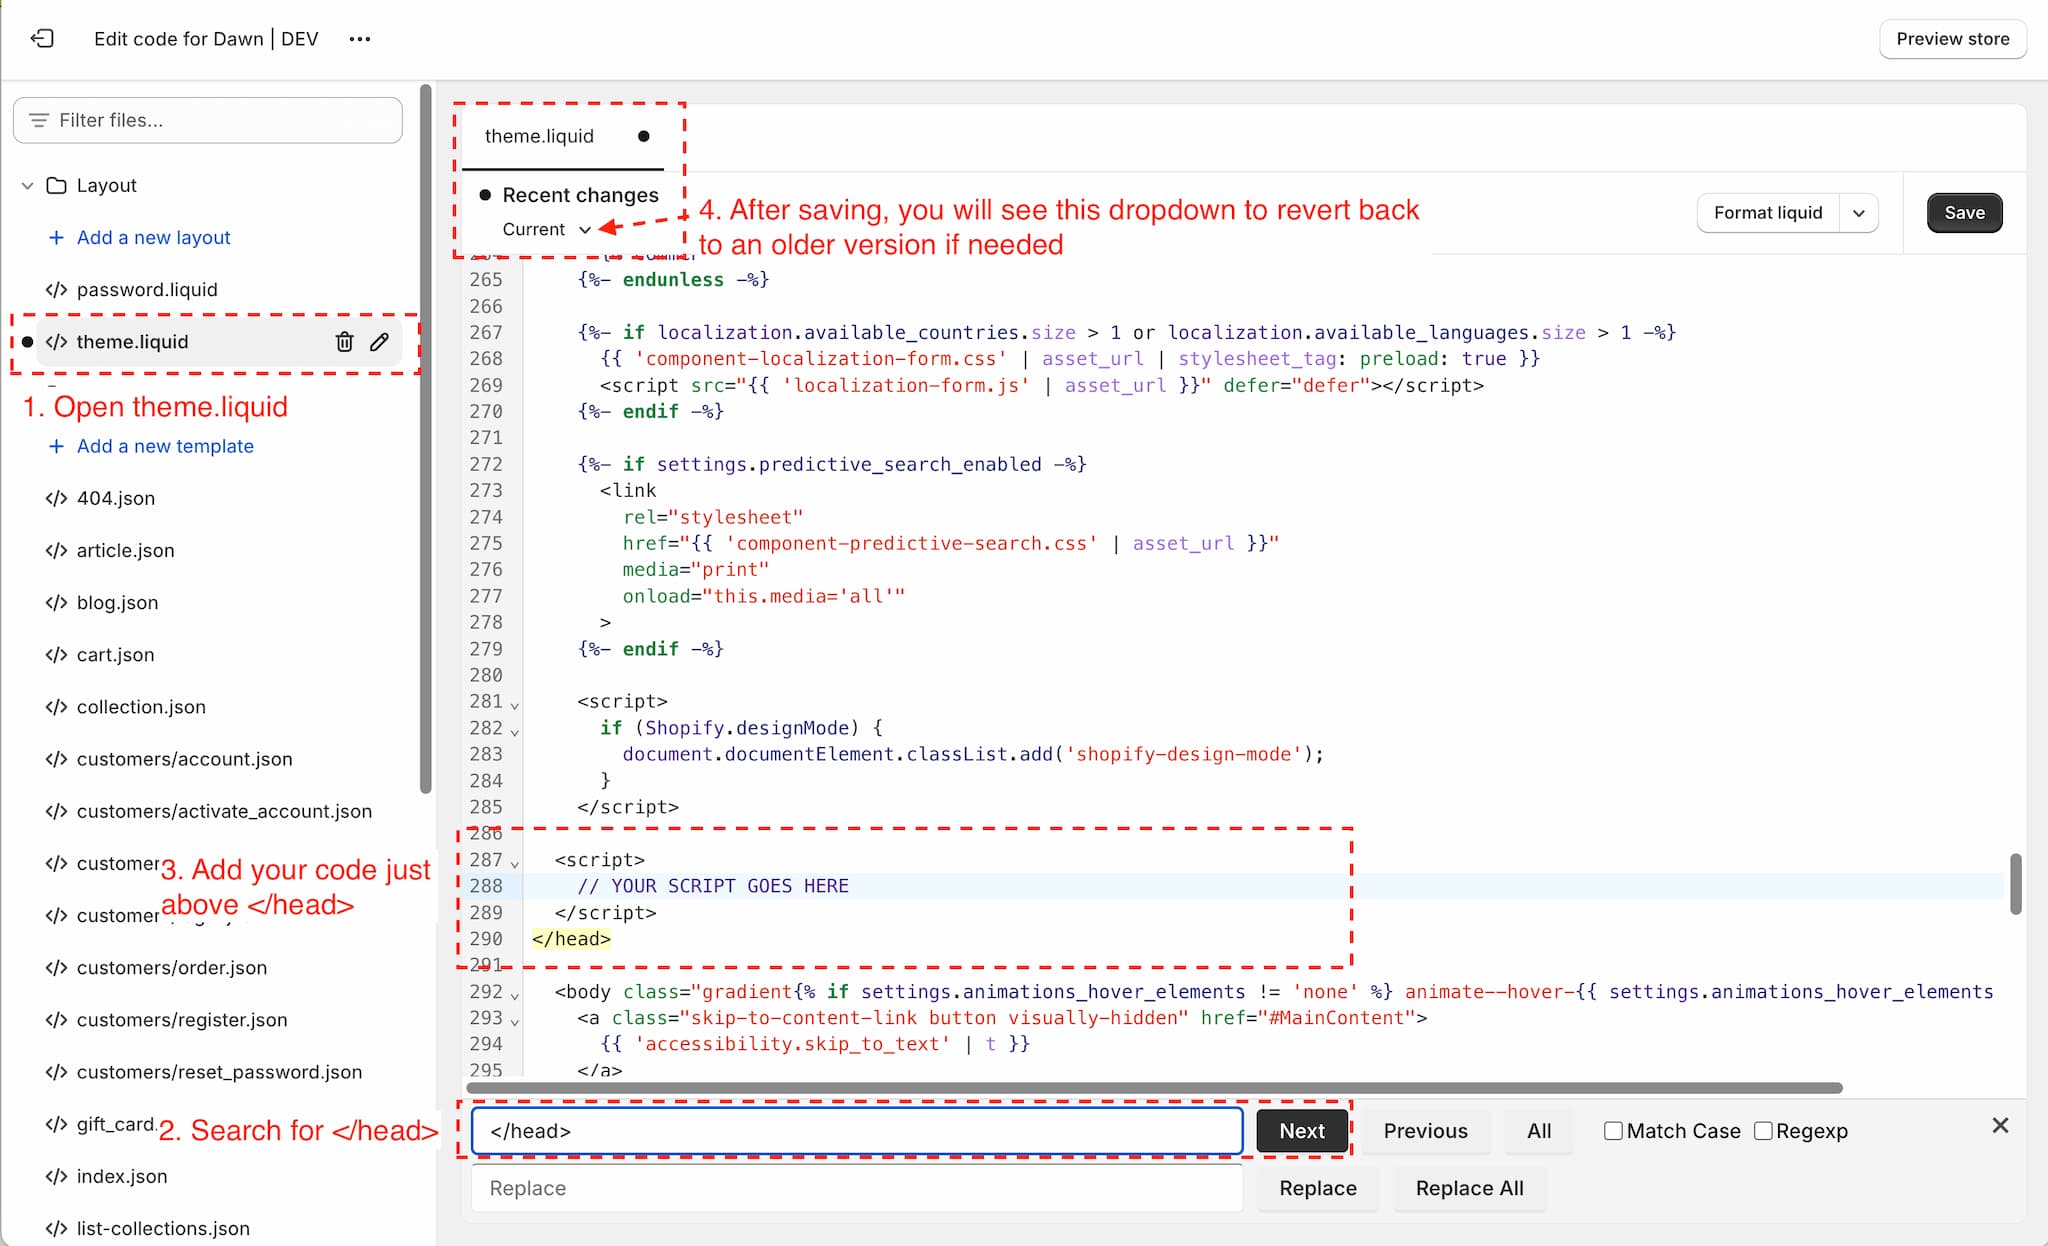
- Find the theme.liquid file (under Layout)
- In your theme.liquid file, hit CMD + F (Mac) or CTRL + F (Windows) to open up a search bar
- Enter </head> in the search
Be sure to include the / in </head>, without the / is <head> and this is the opening tag. If you put code above this, it won't work. - This will take you to the closing tag, or the end of <head> section of your code. Generally, you want to put all your snippets, just above this closing tag.
- Add your snippet by copy and pasting it on the line directly above the </head> tag.
If there's code directly above it, just add in extra lines between them with the ENTER or RETURN key. - Ensure you don't overwrite, or remove any other little bits of code. Removing a single < or > accidentally can actually cause the code (ie. your site) to no longer function.
- Hit Save
- You can also hit the 'Older versions' link that appears at the top if you need to rollback to a previous version of this file, in case something goes awry.
Open theme.liquid and find the tag, then add your snippet just above it.
Step 4 - Preview Your Duplicated Development Theme
- Navigate to Online Store > Themes
- Find the duplicated theme you've been working, select the Actions drop down
- Select Preview
This will open up a preview of that theme on your store for you to check over before publishing it. If it all looks fine, then you did a great job!
Step 5 - Publish The Duplicated Development Theme
- If all looks good above, hit Actions > Publish on the theme you've been working on.
- It will take Shopify a few moments and the duplicated theme will move to the 'Current Theme' slot.
- You can then rename as discussed above.
- Rename ThemeName - LIVE to ThemeName - BACKUP xx-xx-xx (put the date there)
As it's now your backup theme - Rename ThemeName - DEV to ThemeName - LIVE
As it's now your live/production theme - Duplicate the new ThemeName - LIVE and rename it to ThemeName - DEV
So you'll have a new copy to work on when you need to make more changes.
*Make sure your DEVELOPMENT theme is an exact, up to date, duplicate of your production theme before starting new work on it.
Create beautiful bundles.
Bundles and kits on Shopify
Maximise your average order value with mix-and-match bundles and kits.
+ 7 day free trial
